[NODEBB] Help for my custom CSS
-
hmmm I don’t thinks so because I have the same problem on NO PRODUCTION VM and I have this bug too without nodebb-imgur-plugin.
I have test with a local url in public nodebb folder and it’s the same too
I test to desactivate all plugin one by one for see at the moment
@DownPW let me know when your development server is available tomorrow and I’ll take a look at that code I provided previously
-
no problem I’m at home tomorrow all the day
I’ll let you know if I find
-
I think it’s a nodebb issue, because with only one plugin and one theme activate :
- nodebb-plugin-composer-default@9.1.0 (installed, enabled)
- nodebb-theme-persona@12.1.1 (installed, enabled)
Custom CSS, custom JS, custom Header and all custom widgets are disable…
Result it’s the same, I have this bug.
On your dev system, can you test to add a logo for a catégorie, delete the icon and test a new topic in this category ?
I think you will have the same result.
Let me know if you test too !
@DownPW did you delete the icon ? I’m wondering if this creates an orphaned reference to an icon which of course can’t be read.
-
yes off course I delete it
because if Idon’t delete the icon, she appears on bubble
Open issue here:
https://github.com/NodeBB/NodeBB/issues/10896
If I not delete icon, she’s appear but not the image :
-
The issue is closed @phenomlab
It’s a nodebb bug. Fixed in 2.5.3 milestone

-
The issue is closed @phenomlab
It’s a nodebb bug. Fixed in 2.5.3 milestone

@DownPW Yes, I saw that. Caused by regression from what I see.
Thanks
-
JS code seems not working but…
I see on ACP, the image of category is uploaded to imgur :
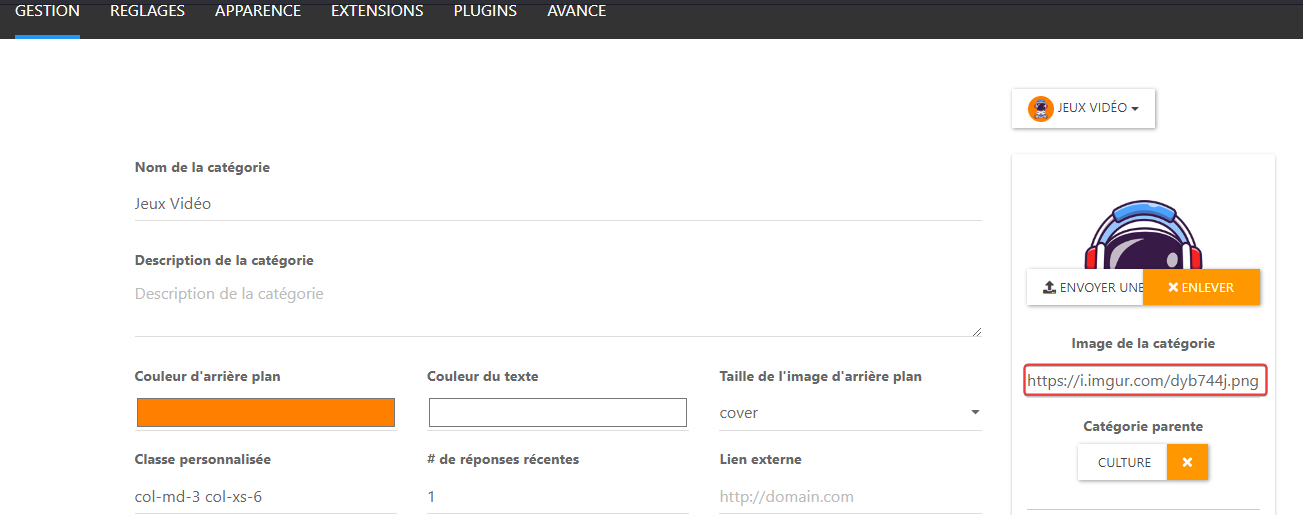
and I see this on dev console :
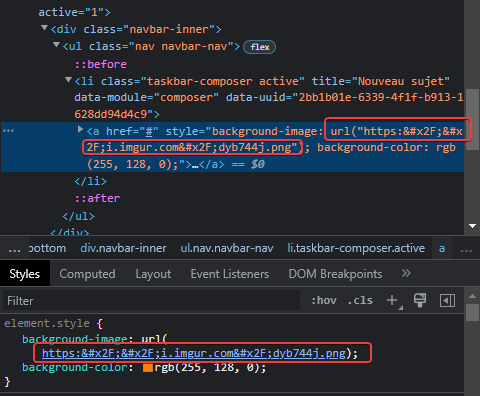
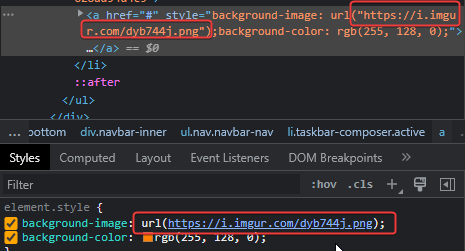
The url seems to not be encoded correctly, I don’t know why ???
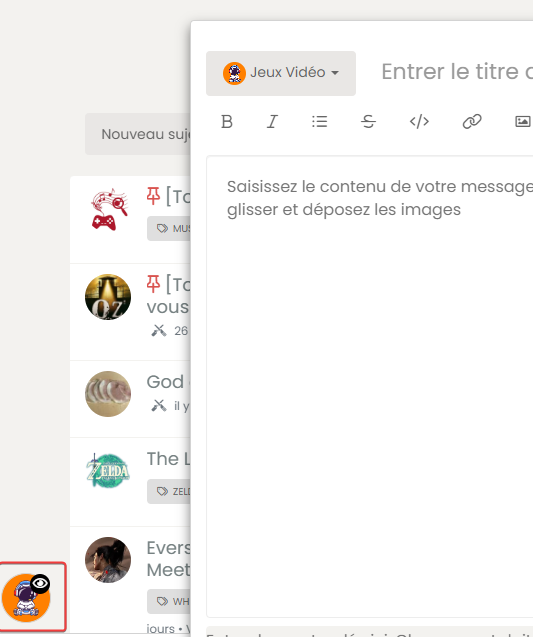
If I change manually the URL in the dev console, it’s OK:
@DownPW said in [NODEBB] Help for my custom CSS:
JS code seems not working but…
Sorry, that should have been something like this (obviously modify the source and replacement)
$(document).ready(function() { $(window).on('action:ajaxify.end', function(data) { $(".row").find($(".fa")).removeClass('fa-fw fa-comments-o').addClass('fa-check-to-slot'); }); }); -
hi @phenomlab
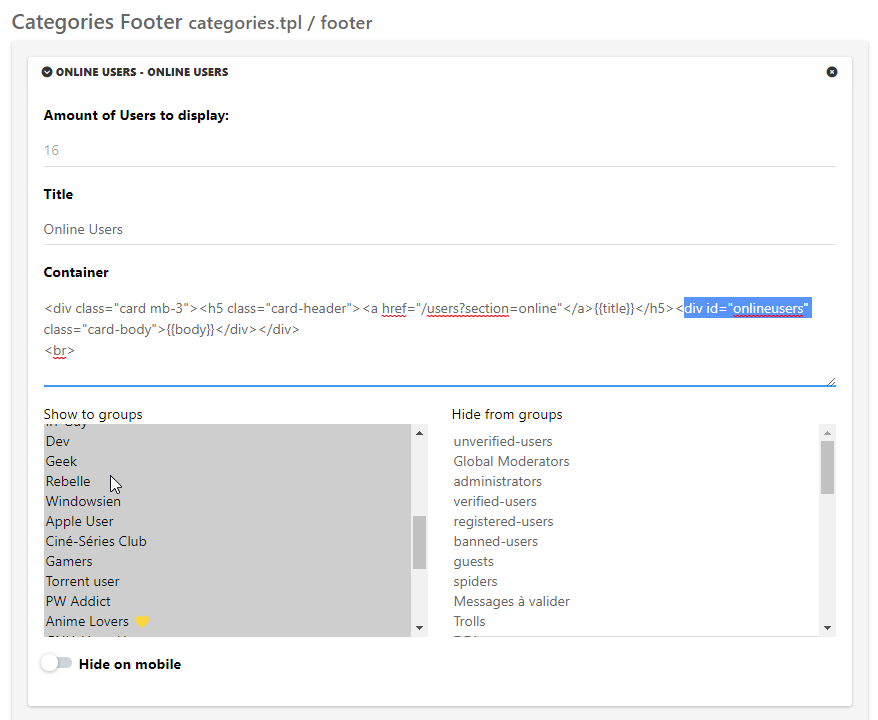
on v2.x , I have user online widget in my home page and I can center the widget like this :
because we have a div by default on the widget
I can’t do the same on v3.x
Any idea how to get the same result ?
Thanks Dude
-
hi @phenomlab
on v2.x , I have user online widget in my home page and I can center the widget like this :

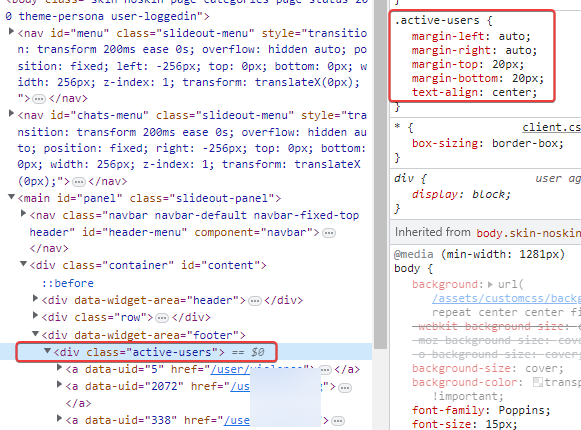
because we have a div by default on the widget
I can’t do the same on v3.x
Any idea how to get the same result ?
Thanks Dude
@DownPW I’d give the widget itself an
idand then add customcssto thatdiv#onlineusers { left: 0; right: 0; margin: 0 auto; position: relative; } -
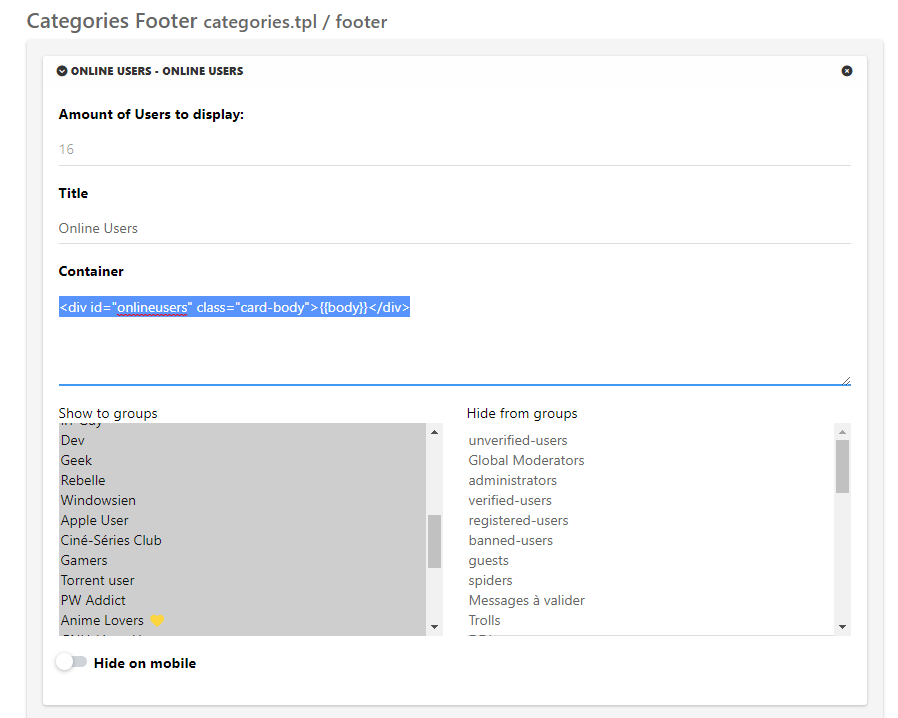
Yep, it’s a good idea thanks to you but I’d like to display it without div card-header and body like the first screen
-
Yep, it’s a good idea thanks to you but I’d like to display it without div card-header and body like the first screen
@DownPW In that case, change the
containercode to<div id="onlineusers">{{body}}</div>And same CSS class
div#onlineusers {
    justify-content: center;
    display: flex;
}
Then add
paddingandmarginto suit -
Hello mark

I wanted for test purposes, to put the welcome message in the Brand menu in the header widget.
I commented in the footer widget the corresponding code then I added it in my brand header widget:
<span id="thisuser" class="getUsername">, <a href="/me"><span class="username">DownPW</span></a></span>I commented out the old CSS to add the new:
/* Welcome Message Username on Header */
span#thisuser {
     margin-top: 0.7rem;
     margin-left: 2px;
     margin-right:-2px;
     font-size: .875rem;
     line-height: 1.4rem;
     font-weight: 500;
}
So far everything is fine, the result is correct :
But as soon as I select links in the left sidebar (home, recent, etc …), the message is added and displayed as many times as I select a link .
Did I miss something or do you have an idea to solve this bug?
Thanks my friend

-
Hello mark

I wanted for test purposes, to put the welcome message in the Brand menu in the header widget.
I commented in the footer widget the corresponding code then I added it in my brand header widget:
<span id="thisuser" class="getUsername">, <a href="/me"><span class="username">DownPW</span></a></span>I commented out the old CSS to add the new:
/* Welcome Message Username on Header */
span#thisuser {
     margin-top: 0.7rem;
     margin-left: 2px;
     margin-right:-2px;
     font-size: .875rem;
     line-height: 1.4rem;
     font-weight: 500;
}
So far everything is fine, the result is correct :

But as soon as I select links in the left sidebar (home, recent, etc …), the message is added and displayed as many times as I select a link .

Did I miss something or do you have an idea to solve this bug?
Thanks my friend

@DownPW sorry for the delay. That is being caused by
ajaxwhich is adding another element each time data is being called. I’d need to see the entire code block where you are adding this to confirm, but from the video you provided, that’s typically caused by the above.You only need that specific function to run once at page load - it’s running each time data is being requested which explains the additions.
-
it’s just the brand HTML header widget, just add this code to him
<span id="thisuser" class="getUsername">, <a href="/me"><span class="username">DownPW</span></a></span>]What do you want ? The HTML header widget on welcome message JS code ?
EDIT : All code in PM
-
it’s just the brand HTML header widget, just add this code to him
<span id="thisuser" class="getUsername">, <a href="/me"><span class="username">DownPW</span></a></span>]What do you want ? The HTML header widget on welcome message JS code ?
EDIT : All code in PM
@DownPW thanks. Can you try a theory for me and change that code so it looks like the below
<span id="thisuserbrand" class="getUsername">, <a href="/me"><span class="username">DownPW</span></a></span>I expect this to return nothing, which will prove my theory around the Ajax calls.
-
Nope @phenomlab
Same things, same problem
-
Nope @phenomlab
Same things, same problem
@DownPW then the problem isn’t the existing function. That ID I provided doesn’t exist anywhere and isn’t tied to any elements so should never trigger.
-
oups don’t know why I have used this code, replace by :
<div class="getUsername">, <a href="/me"><span class="username"></span></a></div>But same problem

