Skip to content

Upgrade issues

Solved Configure

Did this solution help you?
Did you find the suggested solution useful? Why not buy me a coffee? It's a nice gesture, and a great way to show your appreciation 💗

Related Topics
  • Difficult to move posts now, on mobile.

    Bugs
    16
    5 Votes
    16 Posts
    756 Views

    @DownPW Yes, it is. It’s set far too low meaning other elements with a higher preference will sit over the top of it.

  • Composer options on nodebb

    Solved Configure
    8
    3 Votes
    8 Posts
    410 Views

    @Panda You should be able to expose the CSS for these using F12 to get into console

    3591518c-e3a3-4ada-a43c-6b32a5e0359c-image.png

    a2b8ed46-4157-4ff2-85f0-576543380107-image.png

    That should then expose the element once selected

    89d9c545-a47a-40d1-98f4-80cf3b958e8f-image.png

    Here’s the below CSS you need based on the screenshot provided.

    .composer .formatting-bar .formatting-group li[data-format="picture-o"], .composer .formatting-bar .formatting-group li[data-format="spoiler"] { display: none; }
  • 4 Votes
    8 Posts
    461 Views

    @Panda said in Upgrade to NodeBB v3? 2BB or not 2BB, that is the question!:

    So although thats a plugin it has Widget like element and stopped working on the Theme change

    Which is normal based on the widgets being reset when you change themes.

  • NodeBB: Upgrading to NodeBB v3.x

    Solved Configure
    6
    0 Votes
    6 Posts
    315 Views

    @mventures You’d need to connect to the server and execute it directly - not on your local terminal. Review the guide below, which will show you how to gain access via SSH to your server

    https://docs.ovh.com/gb/en/dedicated/ssh-introduction/

    Once you have access, you’ll need to navigate to the actual folder where NodeBB is installed

    You’ll then need to change to the directory as shown below

    /home/unbuntu/nodebb

    fdffe673-bf63-4b6d-a728-5506fddc1aff-image.png

    In most cases, initial access takes you to the root of the file system. You can always issue pwd in a Linux terminal which will show you the Present Working Directory. From there, you can issue the command

    cd /home/ubuntu/nodebb

    Once in the NodeBB directory, you’d use the below commands

    ./nodebb stop git fetch && git checkout develop && git reset --hard origin/develop ./nodebb upgrade ./nodebb start

    Line 1 stops the NodeBB instance
    Line 2 gets the latest files from GIT (repository) and then checks out the development branch. It then resets the version you are using to the development branch ready for v3
    Line 3 Runs the upgrade once the new branch is set, and code pulled
    Line 4 Restarts the NodeBB instance after the upgrade has completed

    Note that when you restart NodeBB and log back in, things will look very different to what you had in v2.

  • Upgrade Problem from 2.8.9 to 2.8.10

    Moved Solved Configure
    15
    1 Votes
    15 Posts
    487 Views

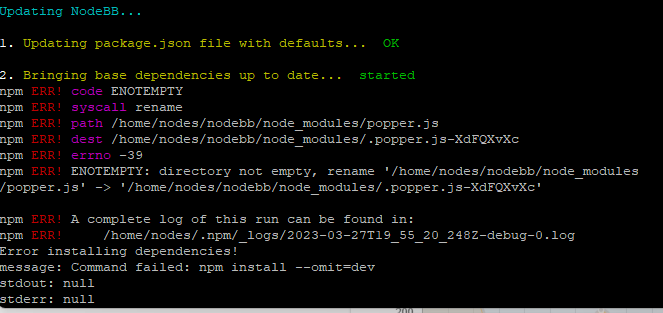
    @cagatay Were any errors displayed during the upgrade process?

  • 5 Votes
    13 Posts
    659 Views
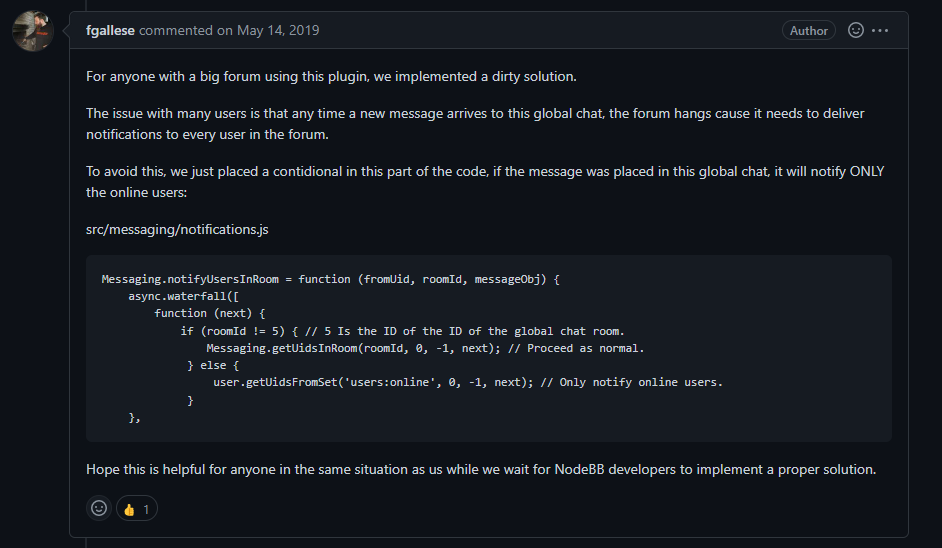
    'use strict'; const winston = require('winston'); const user = require('../user'); const notifications = require('../notifications'); const sockets = require('../socket.io'); const plugins = require('../plugins'); const meta = require('../meta'); module.exports = function (Messaging) { Messaging.notifyQueue = {}; // Only used to notify a user of a new chat message, see Messaging.notifyUser Messaging.notifyUsersInRoom = async (fromUid, roomId, messageObj) => { let uids = await Messaging.getUidsInRoom(roomId, 0, -1); uids = await user.blocks.filterUids(fromUid, uids); let data = { roomId: roomId, fromUid: fromUid, message: messageObj, uids: uids, }; data = await plugins.hooks.fire('filter:messaging.notify', data); if (!data || !data.uids || !data.uids.length) { return; } uids = data.uids; uids.forEach((uid) => { data.self = parseInt(uid, 10) === parseInt(fromUid, 10) ? 1 : 0; Messaging.pushUnreadCount(uid); sockets.in(`uid_${uid}`).emit('event:chats.receive', data); }); if (messageObj.system) { return; } // Delayed notifications let queueObj = Messaging.notifyQueue[`${fromUid}:${roomId}`]; if (queueObj) { queueObj.message.content += `\n${messageObj.content}`; clearTimeout(queueObj.timeout); } else { queueObj = { message: messageObj, }; Messaging.notifyQueue[`${fromUid}:${roomId}`] = queueObj; } queueObj.timeout = setTimeout(async () => { try { await sendNotifications(fromUid, uids, roomId, queueObj.message); } catch (err) { winston.error(`[messaging/notifications] Unabled to send notification\n${err.stack}`); } }, meta.config.notificationSendDelay * 1000); }; async function sendNotifications(fromuid, uids, roomId, messageObj) { const isOnline = await user.isOnline(uids); uids = uids.filter((uid, index) => !isOnline[index] && parseInt(fromuid, 10) !== parseInt(uid, 10)); if (!uids.length) { return; } if (roomId != 11) { // 5 Is the ID of the ID of the global chat room. Messaging.getUidsInRoom(roomId, 0, -1); // Proceed as normal. } else { user.getUidsFromSet('users:online', 0, -1); // Only notify online users. } const { displayname } = messageObj.fromUser; const isGroupChat = await Messaging.isGroupChat(roomId); const notification = await notifications.create({ type: isGroupChat ? 'new-group-chat' : 'new-chat', subject: `[[email:notif.chat.subject, ${displayname}]]`, bodyShort: `[[notifications:new_message_from, ${displayname}]]`, bodyLong: messageObj.content, nid: `chat_${fromuid}_${roomId}`, from: fromuid, path: `/chats/${messageObj.roomId}`, }); delete Messaging.notifyQueue[`${fromuid}:${roomId}`]; notifications.push(notification, uids); } };
  • Recent Cards plugin customization

    Solved Customisation
    21
    13 Votes
    21 Posts
    3k Views

    @pobojmoks that’s easily done by modifying the code provided here so that it targets background rather than border

    In essence, the below should work

    $(document).ready(function() { $(window).on('action:ajaxify.end', function(data) { $('.recent-card-container').each(function(i) { var dataId = $(this).attr("data-cid"); var color = $('[role="presentation"]', this).css("background-color"); console.log("data-cid " + dataId + " is " + color); $('[data-cid="' + dataId + '"] .recent-card').attr("style", "background-color: " + color); }); }); });
  • [NodeBB] greeting message

    Solved Customisation
    2
    3 Votes
    2 Posts
    628 Views

    @pwsincd welcome to sudonix, and thanks for the comments. What your looking for is here

    https://sudonix.com/topic/195/nodebb-welcome-message/3?_=1648295651358