How to install a self-hosted instance of iFramely for use with NodeBB
-
I’ve been asked for a walkthrough of how to install iFramely for use with NodeBB several times, and figured it was about time I posted a guide
 I’ve assisted @cagatay and @DownPW with their installations, but this should be useful for anyone else looking to do something similar.
By way of background, the “hosted” version of iFramely works extremely well, but is not free (what is?) and you’ll exceed their API limit for the free plan very quickly - at which point, they’ll email and inform you that you need to upgrade to one of their paid plans.
Sadly, these aren’t cheap, however, iFramely do very kindly provide a self-hosted version of their application, and you can find out how to install that here. This guide assumes you have a fully functional copy of NodeBB running, and have already installed and activated the relevant plugin. If you haven’t installed the plugin, do this now (from CLI as it’s not listed in the GUI)
npm install nodebb-plugin-iframelyNow activate the plugin, but don’t configure it for the moment. You’ll need to rebuild and restart NodeBB also - don’t forget this step.
Whilst it’s perfectly “feasible” to install iFramely in the same domain as where you host your NodeBB instance, this isn’t generally recommended for security reasons. It ideally needs to be installed in a sub domain (or dedicated domain if you have one), so if your NodeBB URL is something like
https://mynodebb.comthen the subdomain would be something likehttps://media.mynodebb.comI’m detecting some head scratching already
 - how to I create a subdomain, yes? Well, it differs quite heavily depending on the platform you are using, but for sake of keeping this guide short, I won’t list every single method - that would take forever! Instead, let’s take the most common and effective route - Cloudflare.
Configure DNS for subdomain
- Login to the Cloudflare dashboard for your domain, and select DNS
- Add a new A record called “media” and have this point to the same IP address as your existing site
- Ensure that the proxy is enabled (orange cloud - grey cloud is DNS only) so that we pass the same wildcard cert to your server as the existing NodeBB site does
- DNS convergence on Cloudflare is typically within 60 seconds, so it’ll populate very quickly
- If you really want to see how far the propagation has advanced, use this site (very easy to use and self explanatory)
Configure NGINX to accept traffic for new subdomain
You now need to configure your
NGINXinstallation so that it will accept the subdomain when traffic is sent towards it - leaving this step out means your server will likely discard the traffic and you’ll land up with a 404 errorDepending on your *nix build, the
nginx.conffile may be in different places. If you know where your specific conf file is for your NodeBB install, open that now.- You’re going to add the below config (note that some parts such as certificate paths need to be changed so they match the same ones you’re using for NodeBB)
server { listen 443 ssl http2; listen [::]:443 ssl http2; ssl_certificate /etc/ssl/cert.pem; ssl_certificate_key /etc/ssl/key.pem; ssl_client_certificate /etc/ssl/cloudflare.crt; ssl_protocols TLSv1 TLSv1.1 TLSv1.2; server_name media.mynodebb.com; location / { proxy_set_header X-Real-IP $remote_addr; proxy_set_header X-Forwarded-For $proxy_add_x_forwarded_for; proxy_set_header Host $http_host; proxy_set_header X-NginX-Proxy true; proxy_pass http://127.0.0.1:8061/; proxy_redirect off; # Socket.IO Support proxy_http_version 1.1; proxy_set_header Upgrade $http_upgrade; proxy_set_header Connection "upgrade"; } } Again, this is just an example, and will likely need to be modified. Essentially, what we are doing here is sending all traffic into a reverse proxy, where the iFramely installation is listening on port 8061, but will only answer requests from
localhost. This makes the installation much more secure as the reverse proxy is responsible for directing the traffic, and also means you can usehttps://media.mynodebb.cominstead of having to usehttps://media.mynodebb.com:8061which incidentally, if you are using Cloudflare, this particular port isn’t routable with the free plan, so something to be aware of
Obviously, don’t forget to change
https://media.mynodebb.comwith your actual URL
- Save and close the
nginx.conffile - Test the config by running
nginx -tin the CLI (this validates the config before restarting the service to prevent issues) - If all ok in step 3, restart the NGINX service - note that command will vary depending on the Linux distribution you are using, but generally
sudo service nginx restartshould work in most cases (if you are using a Debian backed build)
Install iFramely
- At the root of your
home(again, this depends on where you’ve installed NodeBB - easy to determine as it will contain the NodeBB installation directory when navigated to) issue the following CLI
mkdir iframely git clone https://github.com/itteco/iframely.git cd iframely npm install Note that the user you are installing iFramely under needs admin rights - in most cases, you can use
sudo npm installif the first attempt fails. If the user is not in thesudoersfile, then you should usesu rootand then provide the password. Then complete the install- Once the installation is complete, there are some more steps
cp config.local.js.SAMPLE config.local.js nano config.local.js The above copies the “sample” config file and creates a new file called
config.local.js. I’m also usingnanoas the text editor, as I can’t standvi I’ll leave that preference up to you…
- With the editor open, locate the
baseAppUrlvariable and place the actual URL of the subdomain you are going to use
baseAppUrl: "https://media.mynodebb.com", // use "https://yourdomain.com/path" where you have Iframely in your reverse proxy- Save and exit the file
Start an iFramely instance
- Type
node serverinto the CLI and press enter - This will start a single instance of iFramely
- Now navigate to
admin/plugins/iframelyin your NodeBB installation - Enter the URL you are going to be using as below
Make sure that the URL is appended with
/iframelyas this is the API endpoint where requests are sent- Save the settings
- Reload NodeBB
Initial testing
- Create a new post and place a URL inside it such as https://www.whatsmydns.net/ inside it
- Add tags if needed
- Post it
Hopefully, it’ll look something like this
In addition, if you switch back to the server CLI, you should see items being logged. At this point, it works
 but you’re not quite finished
Using PM2 to create a spawned process daemon
- Go to the CLI on your server and stop the running
node serverby usingCTRL + Z - Ensure that you are in the same folder as the iFramely installation
npm install pm2 -g pm2 start pm2.json pm2 logs Again, make sure that the account you are using has root permissions when try to use
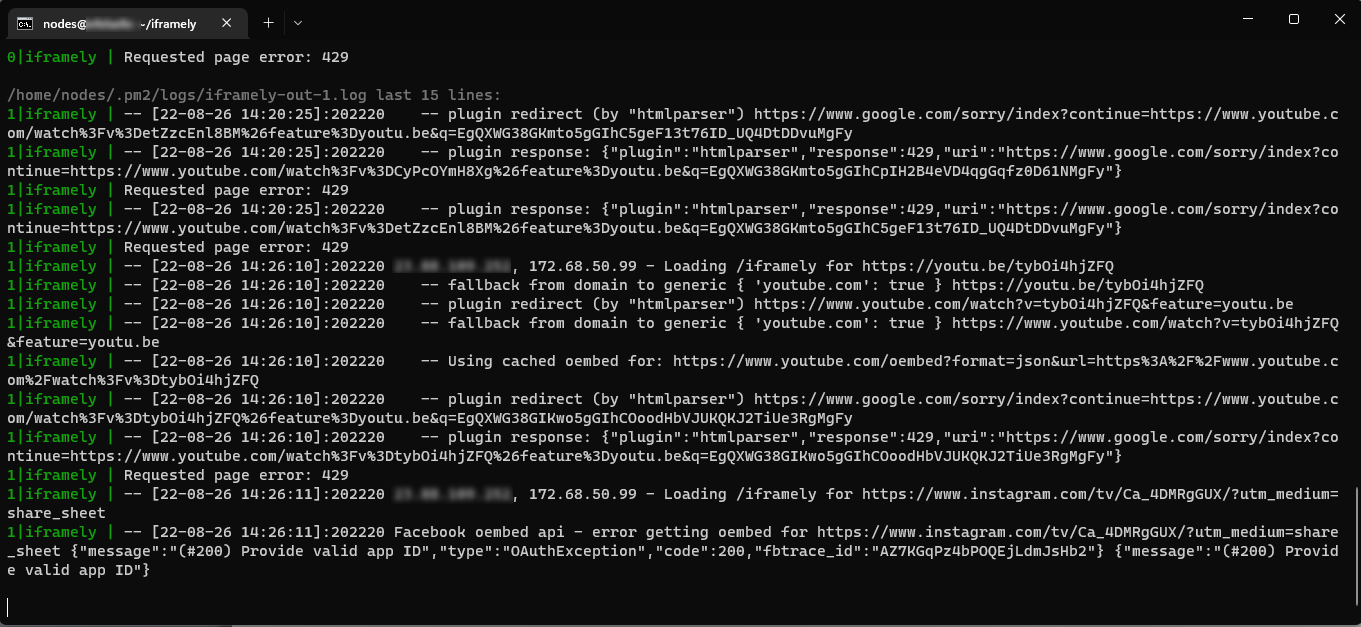
npm installas previously mentionedYou should hopefully see a log being generated like the below which is updated in real time when accessing posts with links
You can safely exit the log with
CTRL + Cwhich won’t affect the daemon.If you want to see if the process is running or not, you can use
pm2 statusSimilarly, if you need to restart the instance, you can do so using
pm2 reload iframelyThat’s pretty much it - hope this was useful.
-
undefined phenomlab marked this topic as a regular topic on 26 Aug 2022, 14:34
-
undefined phenomlab referenced this topic on 26 Aug 2022, 14:34
-
thanks a lot @phenomlab , if it is OK for you, I would like to share our custom CSS codes with self-hosted iframely…
The free version looks quite bigger than the paid version, so we improved the look with these CSS changes… It is still not as pretty as the original iframely embeds, but I believe it is still better than the default one.
Of course, feel free to change/edit it as you like:
.iframely-link .iframely-container { .img-responsive { height:120px !important; width: auto !important; overflow: hidden !important; } .iframely-meta { display: none !important; } .media { float: left !important; padding: 0 5px 0 0 !important; } .media-heading { margin-top: 5px; margin-bottom: 2px; } .description { position: relative !important; top: 10px !important; } .panel-iframely .iframely-embed .one-line { white-space: normal; } .panel-body { padding: 5px; } } -
thanks a lot @phenomlab , if it is OK for you, I would like to share our custom CSS codes with self-hosted iframely…
The free version looks quite bigger than the paid version, so we improved the look with these CSS changes… It is still not as pretty as the original iframely embeds, but I believe it is still better than the default one.
Of course, feel free to change/edit it as you like:
.iframely-link .iframely-container { .img-responsive { height:120px !important; width: auto !important; overflow: hidden !important; } .iframely-meta { display: none !important; } .media { float: left !important; padding: 0 5px 0 0 !important; } .media-heading { margin-top: 5px; margin-bottom: 2px; } .description { position: relative !important; top: 10px !important; } .panel-iframely .iframely-embed .one-line { white-space: normal; } .panel-body { padding: 5px; } }@crazycells thanks for this. I too changed the default layout, but will certainly have a look at your CSS mods because they might be better than mine!

-
thanks a lot @phenomlab , if it is OK for you, I would like to share our custom CSS codes with self-hosted iframely…
The free version looks quite bigger than the paid version, so we improved the look with these CSS changes… It is still not as pretty as the original iframely embeds, but I believe it is still better than the default one.
Of course, feel free to change/edit it as you like:
.iframely-link .iframely-container { .img-responsive { height:120px !important; width: auto !important; overflow: hidden !important; } .iframely-meta { display: none !important; } .media { float: left !important; padding: 0 5px 0 0 !important; } .media-heading { margin-top: 5px; margin-bottom: 2px; } .description { position: relative !important; top: 10px !important; } .panel-iframely .iframely-embed .one-line { white-space: normal; } .panel-body { padding: 5px; } }@crazycells I tried this CSS, and it looks a little “cramped” to me - why not post some screenshots ?
-
-
here is an example… Since previews are just previews and do not give the whole info, we prefer to see them in the text as a small banner with some info in it… free iframely takes a much larger unnecessary space from the post…

@crazycells looks like you’re using a 100% width there which would explain the cramped look on here as I set a static
max-width
-
@crazycells looks like you’re using a 100% width there which would explain the cramped look on here as I set a static
max-width
@phenomlab yes, you have very customized themes here; so I guess CSS codes will need some adjustments for a similar look…
-
Thanks @crazycells for your code, I will test it, for sure

@phenomlab Resources level, do you know to what extent the CPU will be impacted by Iframely?
Generally speaking, our forum uses between 20 and 50% of the CPU. With peaks at 80-90 which return an excess load and unavailability to the forum (a few seconds).
-
Thanks @crazycells for your code, I will test it, for sure

@phenomlab Resources level, do you know to what extent the CPU will be impacted by Iframely?
Generally speaking, our forum uses between 20 and 50% of the CPU. With peaks at 80-90 which return an excess load and unavailability to the forum (a few seconds).
@DownPW iFramely is multi threaded and runs as a cluster, so will spread itself across the amount of cores you have. If you run
pm2 statusyou’ll see how many cores it’s using, plus the memory usage.I’ve never had an issue with it and I know that thousands of sites have it installed with no performance degradation. It scales very well and only seems to occupy a small selection of CPU and memory.
-
@DownPW iFramely is multi threaded and runs as a cluster, so will spread itself across the amount of cores you have. If you run
pm2 statusyou’ll see how many cores it’s using, plus the memory usage.I’ve never had an issue with it and I know that thousands of sites have it installed with no performance degradation. It scales very well and only seems to occupy a small selection of CPU and memory.
Ok @phenomlab
Thanks for your answer but with pm2 status command, I see a % of CPU used but not the number of CPU core used…
-
Ok @phenomlab
Thanks for your answer but with pm2 status command, I see a % of CPU used but not the number of CPU core used…
@DownPW how many cores do you have ?
-
-
@DownPW OMG

-
ha ha, i’m tired voila

you say this:
if you are using Cloudflare, this particular port (8061) isn’t routable with the free plan, so something to be aware of
@phenomlab
I’m using a free plan from CloudFlare, will this bother me for use Iframely on my server? -
ha ha, i’m tired voila

you say this:
if you are using Cloudflare, this particular port (8061) isn’t routable with the free plan, so something to be aware of
@phenomlab
I’m using a free plan from CloudFlare, will this bother me for use Iframely on my server?@DownPW only if you choose to not proxy the traffic (grey cloud only, which is just DNS rather than the default orange cloud)
-
ha ha, i’m tired voila

you say this:
if you are using Cloudflare, this particular port (8061) isn’t routable with the free plan, so something to be aware of
@phenomlab
I’m using a free plan from CloudFlare, will this bother me for use Iframely on my server?@DownPW you will win this war

-
-
@DownPW no. It needs to be an A record. CNAME is canonical meaning that traffic sent to it will land up at your main nginx site. The A record will sent headers which nginx can use to route the traffic correctly.
CNAME records do not have this and will resolve to the underlying host which will cause you problems. Useful for WWW and non-WWW, but that’s about it.
Essentially, it’s an alias and not a record in it’s own right.
@phenomlab i think my ifamely started to not work i dont know why
 youtube embed not working
[PM2][ERROR] Process or Namespace iframely not found
[PM2][WARN] Current process list is not synchronized with saved list. App iframely iframely differs. Type ‘pm2 save’ to synchronize. -
@cagatay is the
iframelyservice started ? That error message would indicate it’s not running
Hello! It looks like you're interested in this conversation, but you don't have an account yet.
Getting fed up of having to scroll through the same posts each visit? When you register for an account, you'll always come back to exactly where you were before, and choose to be notified of new replies (ether email, or push notification). You'll also be able to save bookmarks, use reactions, and upvote to show your appreciation to other community members.
With your input, this post could be even better 💗
RegisterLog in

