Skip to content

World

Topics from outside of this forum. Views and opinions represented here may not reflect those of this forum and its members.

A world of content at your fingertips…

Think of this as your global discovery feed. It brings together interesting discussions from across the web and other communities, all in one place.

While you can browse what's trending now, the best way to use this feed is to make it your own. By creating an account, you can follow specific creators and topics to filter out the noise and see only what matters to you.

Ready to dive in? Create an account to start following others, get notified when people reply to you, and save your favorite finds.

Register Login
  • phenomlab

    Based on the previous “threaded” capabilities Sudonix had in v2 of NodeBB, and despite me stating that it wouldn’t return… well - I’ve missed it! So much so, that I’ve completely redesigned and developed it.

    Those with eagle eyes might have noticed this toggle switch in the thread view - note that this will only trigger on desktops with a size of 1200px minimum for obvious screen estate reasons, so it won’t be available on mobile devices. I “could” make it available, but in my opinion, it would look horrible 🤢 (so I haven’t).

    So that does this “toggle switch” do?

    faa8375f-d823-44b0-9a3a-946a127f9ebb-image.png

    You’ll notice that to the left, you have a simple “bars” icon, and to the right, a “staggered bars” icon. This essentially means that if the toggle is off, the normal post view is presented -which looks a bit like this

    95922787-ecb2-48c0-a468-a22a06e71c7b-image.png

    Nothing new there you might say (apart from the timeline positioning perhaps…). Now toggle the switch…and you should see the “magic” happen

    d76fe017-2c01-4a63-a679-ca873e39f9d1-image.png

    You’ll (hopefully) notice that the post view becomes “threaded” in the sense that it takes the approach of whom is posting, and makes a decision to reposition those elements to give you a “threaded” view. This (well, I think so) significantly improves readibility on larger screens and makes the reading experience so much better on the eyes.

    Take a good long thread like the below to see it in full

    https://sudonix.org/topic/184/move-out-from-flarum-to-wordpress

    It’s hard to show you just how well this works without a video… So my advice is try it out for yourself 🙂


    Updated git for above change https://github.com/phenomlab/nodebb-harmony-threading/commit/14a4e277521d83d219065ffb14154fd5f5cfac69
  • DownPW

    Hello Mark,

    I’m using and configuring my domain with CloudFlare/virtualmin and would like to be able to use virtualmin and postfix so that applications on my server (like vaultwarden for example) can send emails securely via selhosted SMTP.

    Being a little lost in this jungle, could you do a detailed tutorial with screen for :

    • DNS/Cloudflare configuration (SPF, MX, DKIM, DMARC)
    • Activate email on a virtualmin domain with postfix
    • Configure email postfix on virtualmin and postfix
    • Configure firewall for emailing (virtualkmin)
    • Testing

    Thank a lot in advance.

    DownPW


    @DownPW any update?
  • phenomlab

    Security experts have urged Android users to delete five apps from their phones immediately over fears they are infected with malware.

    Samsung Galaxy phones are particularly at risk from the nasty bug called Anatsa, which is a banking trojan.

    It is capable of performing actions on a victim’s phone without them knowing, including taking money from their bank account.

    The apps, which had been available on the Google Play Store, are:

    • Phone Cleaner – File Explorer
    • PDF Viewer – File Explorer
    • PDF Reader – Viewer & Editor
    • Phone Cleaner: File Explorer
    • PDF Reader: File Manager

    Article courtesy of Life Hacker

    https://lifehacker.com/tech/delete-these-android-malware-apps-asap


  • phenomlab

    First, devise a naming convention for your NTFY installation. This ideally should be a subdomain as it means you can logically and physically separate your main instance of NodeBB (for example) and make it work independently. This is highly recommended, as we will be using a reverse proxy to setup NTFY and some of those settings differ to what NodeBB already uses.

    First, choose a subdomain you’d like to use – in my case, this will be notify.sudonix.org, and will point to the same IP address as the server hosting my NodeBB installation. You’ll obviously need to make changes to your DNS so that this works as intended. If you are using Cloudflare, you must disable the proxy.
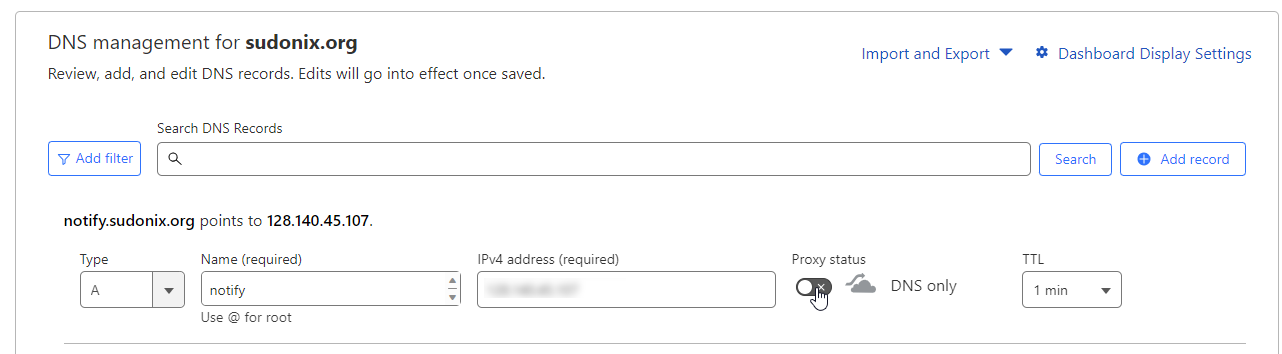
    0358aa66-573d-408b-adfc-dd33b58f1166-image.png

    Allow sufficient time for the DNS to replicate fully. I typically set a low TTL (Time To Live) where possible, and CF allows you to set as low as 60 seconds. You can check on DNS population progress using one of the many checkers available - this one is my go-to

    https://www.whatsmydns.net/

    Now that your DNS record has populated, you can start working on the NTFY build.

    Depending on the version of Linux (or even Windows) you are using, there are a multitude of different packages you can use, including those maintained by Ubuntu / Debian themselves. For the purposes of this guide, I’m assuming Ubuntu / Debian, and this means you should use the below (as root)

    sudo mkdir -p /etc/apt/keyrings
    curl -fsSL https://archive.heckel.io/apt/pubkey.txt | sudo gpg --dearmor -o /etc/apt/keyrings/archive.heckel.io.gpg
    sudo apt install apt-transport-https
    sudo sh -c "echo 'deb [arch=amd64 signed-by=/etc/apt/keyrings/archive.heckel.io.gpg] https://archive.heckel.io/apt debian main' \
        > /etc/apt/sources.list.d/archive.heckel.io.list"  
    sudo apt update
    sudo apt install ntfy
    sudo systemctl enable ntfy
    sudo systemctl start ntfy
    

    At this point, we could run ntfy serve although this will start the communication on port 80 which isn’t what we want because it will conflict with NGINX, so we will need to change the port

    sudo nano /etc/ntfy/server.yml
    

    Make the below changes, obviously substituting my any details with your own

    # All the things: Behind a proxy, Firebase, cache, attachments, 
    # SMTP publishing & receiving
    
    base-url: "https://<your domain fqdn>"
    listen-http: "127.0.0.1:2586"
    cache-file: "/var/cache/ntfy/cache.db"
    behind-proxy: true
    attachment-cache-dir: "/var/cache/ntfy/attachments"
    keepalive-interval: "45s"
    

    Note that if you need to support iOS based devices, you must add the below directly under the base-url: line

    upstream-base-url: "https://ntfy.sh"
    

    Now issue ntfy serve and ensure that the instance starts with the correct port

    04cdabe2-0aba-4b73-a1b9-bece9edf2f36-image.png

    A sample of the NGINX configuration will look like this

    server {
        listen <your ip address>;
        server_name <your server name>;
        root <path to your home directory>
        location / {
            # Redirect HTTP to HTTPS, but only for GET topic addresses, since we want 
            # it to work with curl without the annoying https:// prefix
            set $redirect_https "";
            if ($request_method = GET) {
                set $redirect_https "yes";
            }
            if ($request_uri ~* "^/([-_a-z0-9]{0,64}$|docs/|static/)" ) {
                set $redirect_https "${redirect_https}yes";
            }
            if ($redirect_https = "yesyes" ) {
                return 302 https://$http_host$request_uri$is_args$query_string;
            }
    
            proxy_pass http://127.0.0.1:2586;
            proxy_http_version 1.1;
    
            proxy_buffering off;
            proxy_request_buffering off;
            proxy_redirect off;
    
            proxy_set_header Host $http_host;
            proxy_set_header Upgrade $http_upgrade;
            proxy_set_header Connection "upgrade";
            proxy_set_header X-Forwarded-For $proxy_add_x_forwarded_for;
    
            proxy_connect_timeout 3m;
            proxy_send_timeout 3m;
            proxy_read_timeout 3m;
    
            client_max_body_size 0; # Stream request body to backend
        }
        ssl_certificate /home/sudonix.org/ssl.cert;
        ssl_certificate_key /home/sudonix.org/ssl.key;
    }
    
    server {
        listen <your ip address>:443 ssl http2;
        server_name notify.sudonix.org;
        root <path to your home directory>
        # See https://ssl-config.mozilla.org/#server=nginx&version=1.18.0&config=intermediate&openssl=1.1.1k&hsts=false&ocsp=false&guideline=5.6see https://ssl-config.mozilla.org/#server=nginx&version=1.18.0&config=intermediate&openssl=1.1.1k&hsts=false&ocsp=false&guideline=5.6
        ssl_session_timeout 1d;
        ssl_session_cache shared:MozSSL:10m; # about 40000 sessions
        ssl_session_tickets off;
        ssl_protocols TLSv1.2 TLSv1.3;
        ssl_ciphers ECDHE-ECDSA-AES128-GCM-SHA256:ECDHE-RSA-AES128-GCM-SHA256:ECDHE-ECDSA-AES256-GCM-SHA384:ECDHE-RSA-AES256-GCM-SHA384:ECDHE-ECDSA-CHACHA20-POLY1305:ECDHE-RSA-CHACHA20-POLY1305:DHE-RSA-AES128-GCM-SHA256:DHE-RSA-AES256-GCM-SHA384;
        ssl_prefer_server_ciphers off;
    
        ssl_certificate <path yo your certificate file>
        ssl_certificate_key <path yo your certificate key>
    
        location / {
            proxy_pass http://127.0.0.1:2586;
            proxy_http_version 1.1;
    
            proxy_buffering off;
            proxy_request_buffering off;
            proxy_redirect off;
    
            proxy_set_header Host $http_host;
            proxy_set_header Upgrade $http_upgrade;
            proxy_set_header Connection "upgrade";
            proxy_set_header X-Forwarded-For $proxy_add_x_forwarded_for;
    
            proxy_connect_timeout 3m;
            proxy_send_timeout 3m;
            proxy_read_timeout 3m;
    
            client_max_body_size 0; # Stream request body to backend
        }
    }
    

    Obviously, you need to supply the information requested in <your information> as this pertains to your installation. Now save your config, ensure there are no errors, and in the console, issue ntfy serve. Now browse to the URL you want to use, and you should see something like the below
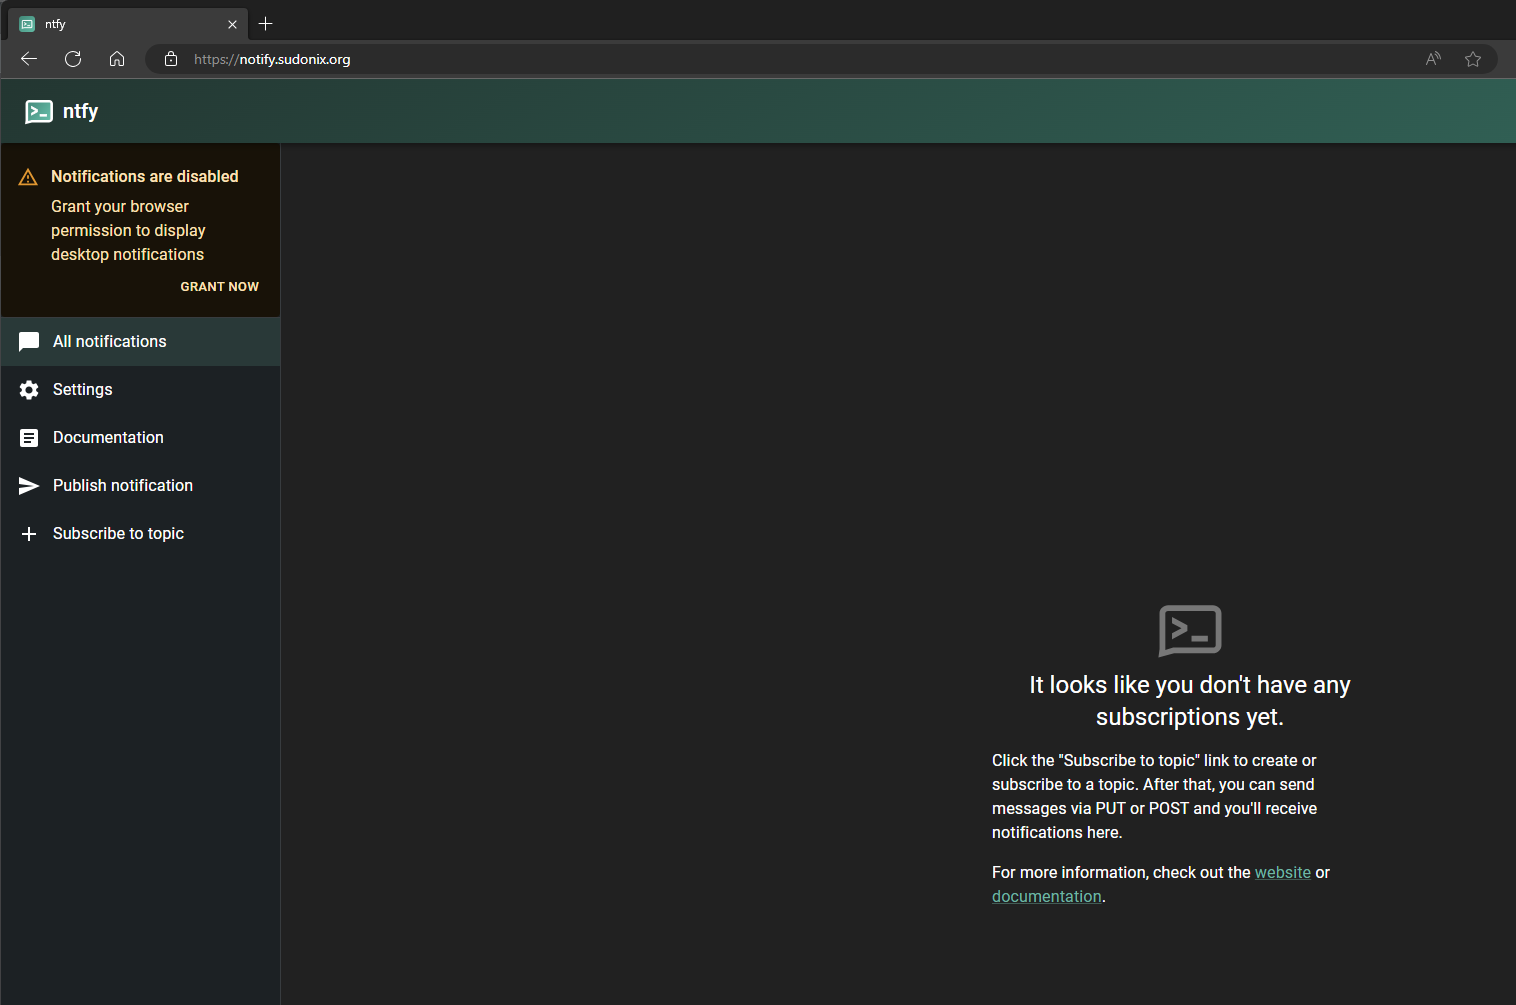
    caaebe69-0017-42ed-9828-4b78971319cd-image.png

    In the ACP, go to Plugins -> NTFY, and set your NTFY URL
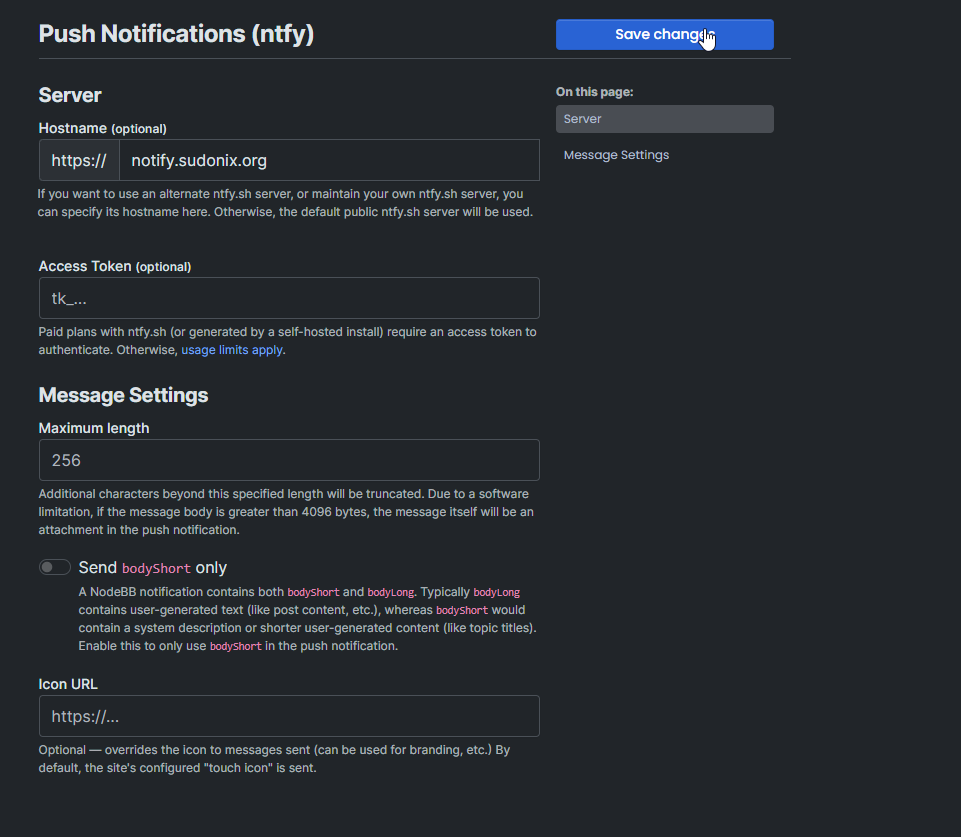
    6ea26962-b6f9-4021-893b-0324fc044d99-image.png

    Note, that the Access Token isn’t mandatory, but is a good idea to secure the stream. You can generate your own (64bit) here. Use the format in NodeBB as tk_<token>

    https://it-tools.tech/token-generator

    Click Save Changes, and restart NodeBB

    Now go your profile settings in NodeBB and select “Push Notifications”
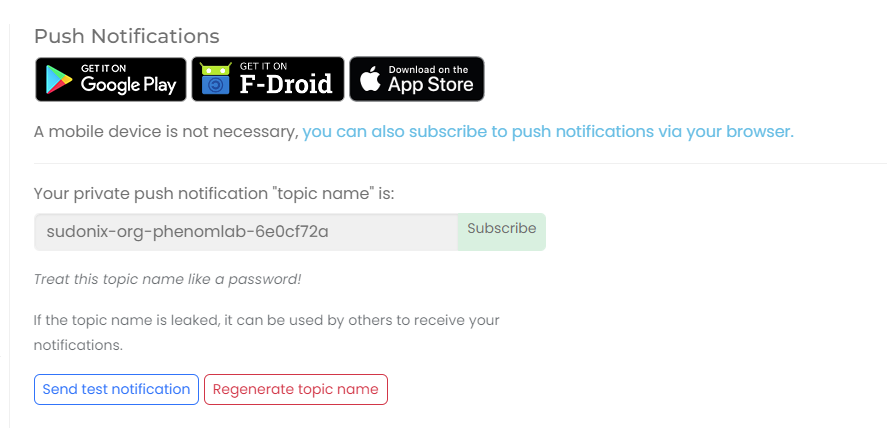
    aea5d7be-b4e2-4cd0-a5e7-2aade84c0fc9-image.png

    Copy “Private Push Link” and then go to your NTFY self-hosted instance - note, you’ll also see that there is a “Subscribe” button which you can use if you prefer, but you’ll need the latest version of nodebb-plugin-ntfy installed.

    Click “Subscribe to a topic”
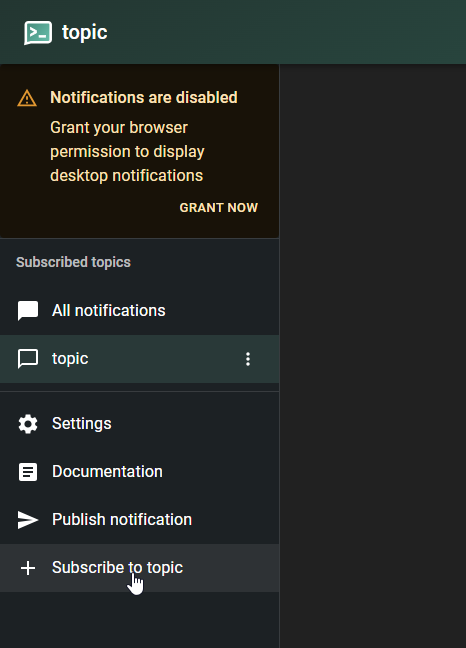
    104f493d-c616-40a8-b2ed-54b7cf359a44-image.png

    Paste the value you copied previously
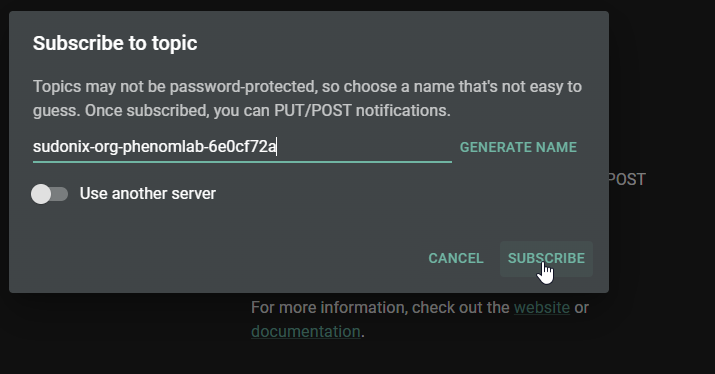
    9baf0d3b-632c-4b56-b71f-4801e42c0246-image.png

    Click Subscribe

    Now go back to your user settings, and click “Send test notification”

    82d8f381-028d-43cd-9ceb-b2206ec4b6ec-image.png

    Ensure you see the message appear in your new instance
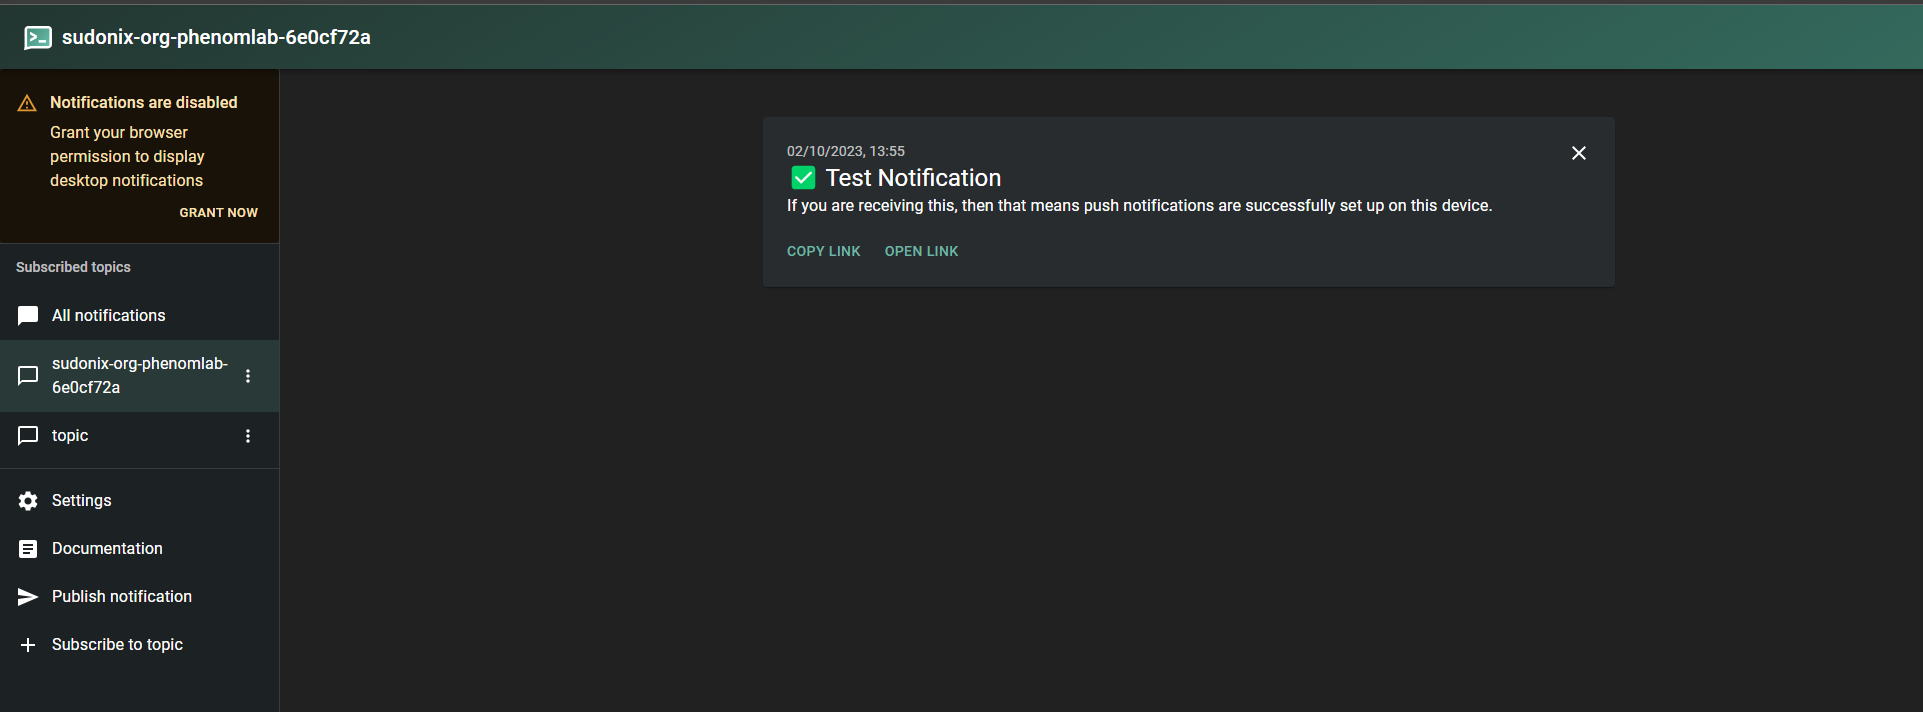
    2cb45232-251a-4292-830f-2d727cf947bc-image.png

    The message should have arrived! If it has, then you’re done.

    Well - almost. There is a raft of settings you can apply, such as tokens, ACL’s etc - the guide is very verbose and goes into specific detail, which you can review here

    IMPORTANT: if you are using a mobile device, you should install the dedicated apps for Android and iOS rather than use the web versions.

    https://docs.ntfy.sh/


    @sebmegag hi. Welcome aboard! I’ve tried this on both iPhone and Android and it works fine. Did you double check the config you have?
  • ahmed

    What causes this error when I want to backup Mongo DB?
    nd.PNG


    You might want to also review this post https://sudonix.org/topic/389/mongodb-backup-script
  • phenomlab

    I am not a fan of the Google Analytics platform for a variety of reasons - the most important being its lack of privacy, lack of full GDPR compliance, and most of all, it will easily slow your site down. Whilst literally every website owner on the planet wants some form of visibility into how their site performs, who uses it, and where the traffic originates from, it’s difficult to obtain this data in the most efficient manner, and still respect the privacy of visitors to your website.

    For a while, I used Matomo, although over time, it’s pretty clear that their original mission is changing, and they are looking to monetise what was once an Open Source product. Don’t get me wrong - it still is, but if you take a look at their website, you’ll see what I mean 🙂

    Additionally, Matomo runs on PHP and MySQL. It has a lot of settings, and in my view, it is unnecessarily complex. I wanted something

    1. Lightweight
    2. Simple to setup
    3. Simple to get the data I want without having to spy on people 🙂

    It was at this point that I stumbled across Umami Stats

    https://umami.is/features

    And here’s their tagline

    7197434f-2e66-42a8-857b-75a9361247d0-image.png

    Being curious, I decided to stand up my own self-hosted installation to see what it can do.

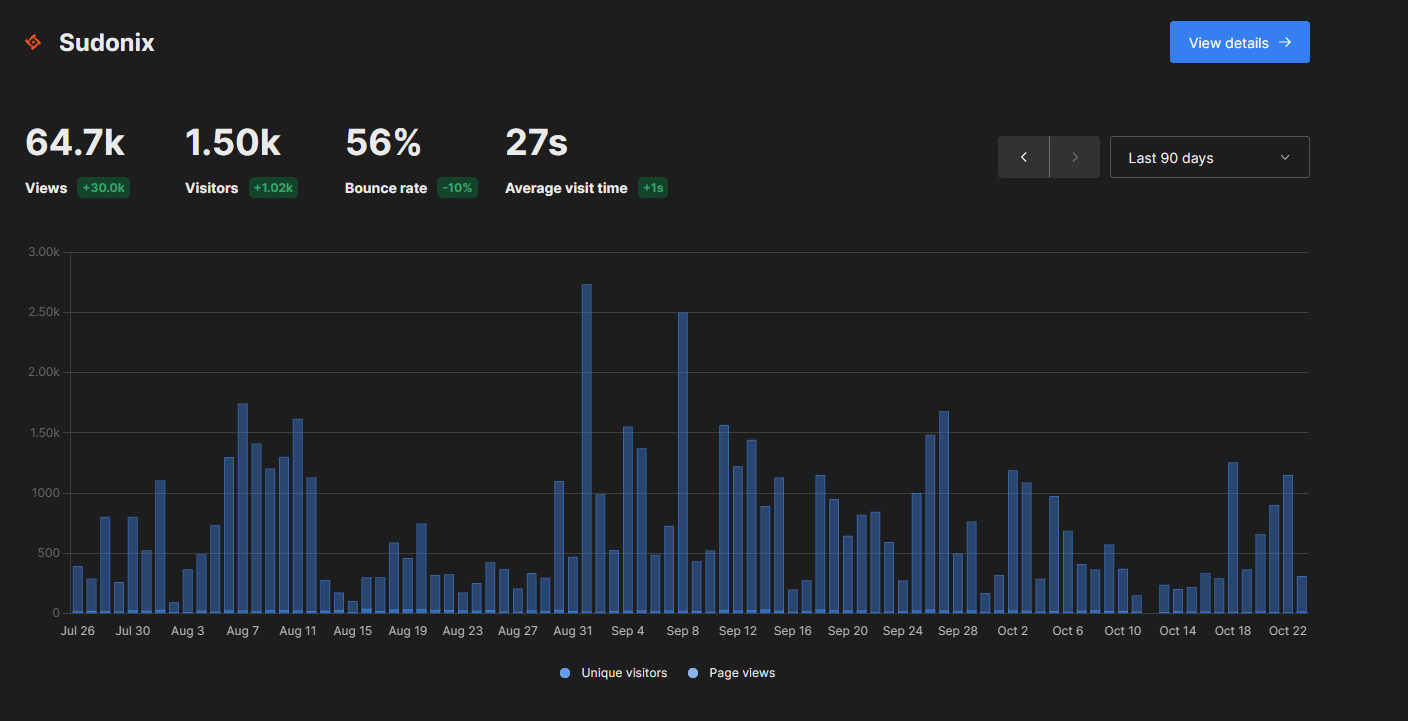
    Here’s the result

    c6aff45d-7cd0-4220-8c75-ce878970c7ce-image.png

    If you are looking for no-nonsense stats that just “work” without impacting the privacy of your users, I’d suggest you take a look at this.


    For anyone else coming here and is struggling to get pm2 to work with Umami (as I did - it started, but never seemed to work after a reboot which is pretty useless), you can use the below. Obviously, change the parts noted inside the [brackets]. Follow the below instructions: Instructions Open a terminal and create a new systemd service file: sudo nano /etc/systemd/system/umami.service Add the following content to the file: [Unit] Description=Umami Analytics Server After=network.target [Service] Type=simple User=[umami user] WorkingDirectory=[path to umami] ExecStart=/usr/local/bin/node [path to umami]/node_modules/.bin/next start Restart=on-failure [Install] WantedBy=multi-user.target Replace [umami user] with the username of the user that should run the Umami service, and [path to umami] with the actual path to your Umami installation. Save the file and exit the editor. Reload the systemd manager configuration: sudo systemctl daemon-reload Enable the Umami service to start on boot: sudo systemctl enable umami.service Start the Umami service: sudo systemctl start umami.service You can check the status of the service with: sudo systemctl status umami.service This systemd service file will ensure that Umami starts automatically when the system boots, and it will restart the service if it fails. Remember to adjust the WorkingDirectory and ExecStart paths according to where Umami is installed on your system, and ensure that Node.js is installed and accessible at /usr/bin/node (or adjust the path to Node.js as necessary).
  • phenomlab

    This is an interesting / alarming read.

    Amazon France Logistique, a subsidiary of the e-commerce giant that manages its large warehouses in France, has been fined €32m ($35m) for infringing its workers’ privacy.

    Following an investigation into Amazon France Logistique’s surveillance system which was set up to monitor staff performance, France’s information regulator, considered it to be "excessively intrusive.”

    https://www.infosecurity-magazine.com/news/cnil-france-amazon-32m-fine-spying/


    @DownPW This won’t be the first time that Amazon and others like them are being bought to account. I recall seeing a documentary on the TV recently where they sent in a reporter with secret cameras to film the strict regimen and constant threat of being fired for not meeting targets that workers are placed under. The surveillance just takes this to a whole new level in my view and it’s like being placed under a microscope for constant scrutiny. This goes well beyond the surveillance placed on prisoners!
  • ahmed

    xx.PNG

    xxxx.PNG


    I just wanted to ask because I don’t have much knowledge about the new installation. Thank you for the explanatory answer.
  • phenomlab

    Those in the security space may already be aware of the secure DNS service provided by Quad9. For those who have not heard of this free service, Quad9 is a public Domain Name System (DNS) service that provides a more secure and privacy-focused alternative to traditional DNS services. DNS is the system that translates human-readable domain names (like www.google.com) into IP addresses that computers use to identify each other on the internet.

    Quad9 is known for its emphasis on security and privacy. It uses threat intelligence from various cybersecurity companies to block access to known malicious websites and protect users from accessing harmful content. When a user makes a DNS query, Quad9 checks the requested domain against a threat intelligence feed, and if the domain is flagged as malicious, Quad9 blocks access to it.

    One notable feature of Quad9 is its commitment to user privacy. Quad9 does not store any personally identifiable information about its users, and it does not sell or share user data.

    https://www.quad9.net/

    Users can configure their devices or routers to use Quad9 as their DNS resolver to take advantage of its security and privacy features. The DNS server addresses for Quad9 are usually 9.9.9.9 and 149.112.112.112.

    The name “Quad9” is derived from the service’s use of four DNS servers in different geographic locations to provide redundancy and improve reliability. Users can configure their devices or routers to use the Quad9 DNS servers, and doing so can offer an additional layer of protection against malware, phishing, and other online threats. It’s important to note that while Quad9 can enhance security, it is not a substitute for other security measures such as antivirus software and good internet security practices, and if you are not using these technologies already, then you are leaving yourself open to compromise.

    I’d strongly recommend you take a look at Quad9. Not only is it fast, but it seems to be extremely solid, and well thought out. If you’re using Cloudflare for your DNS, Quad9 is actually faster.


    I’ve been using this service for a couple of days now, and it’s made my internet access so much faster. That alone is a plus, and I never thought there would be a contender for Cloudflare in this area.
  • phenomlab

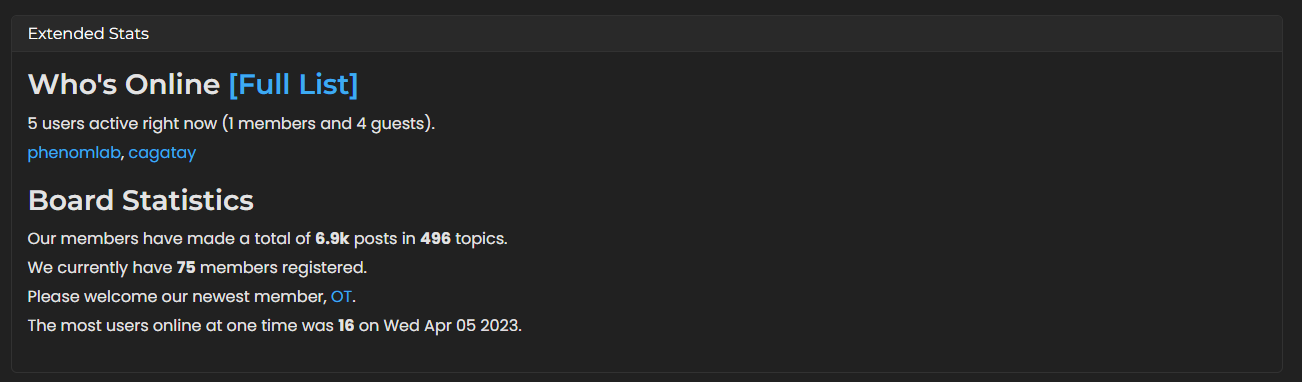
    I had someone mention to me yesterday that they liked the footer widget present on the Categories page, which looks like the below

    86490b64-c376-4d65-bb58-7ab6974b3531-image.png

    This isn’t custom code at all, but in fact the “Board Stats” widget which is added when nodebb-widget-board-stats is installed. However, there were various elements I didn’t like - particularly, the layout, which by default (on here) would have looked like this

    8afe3e4a-3d0b-4600-94ee-2f49fc9755e1-image.png

    There’s nothing “wrong” with it (apart from the fact that the calculations seem a little off with actual users vs guests - not a show stopper for me), but I didn’t want some elements to be displayed, and so I used the below CSS to hide them, and then modify the alignment so it looks like the first image

    .widget-board-stats {
        display: flex;
        flex-direction: row-reverse;
        justify-content: space-around;
    }
    .widget-board-stats h3 {
        display: none;
    }
    

    This basically hides anything in that widget that uses h3 as the header, and then arranges the widget itself so that flex-direction and justify-content are included which lines up everything nicely.

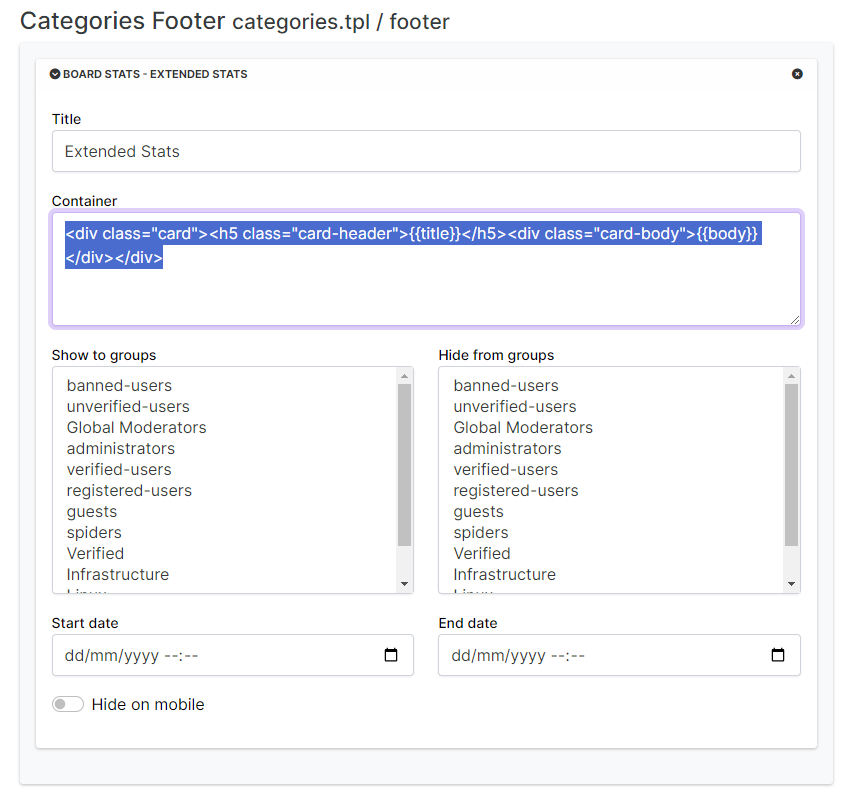
    If you’d like the widget to look like a card, you can set that in the widget itself by adding the below code into the widget container

    <div class="card"><h5 class="card-header">{{title}}</h5><div class="card-body">{{body}}</div></div>
    

    Effectively, the below.

    72cd64c2-cd44-4195-8906-438d9126ee45-image.png

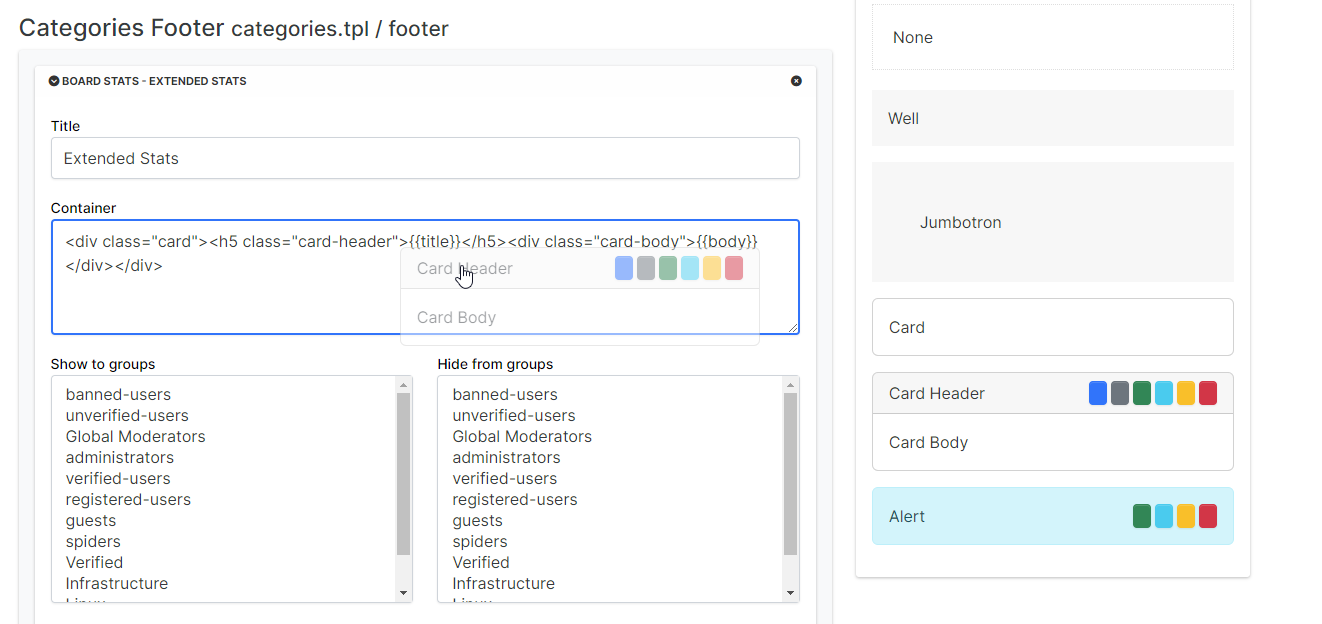
    Or, you can drag the card element into the container area like the below, and drop it

    fabebce6-0b44-4ad9-9160-023103dc0aa5-image.png

    Enjoy.


    thanks Mark.
  • Sala

    Hi, on the comment section of my WordPress there is a white border that is hidden on the fields that i need to change its color. Because I’m using a mobile phone i am unable to do it.

    Help me with the elements, thanks

    alt text


    @Sala yes please.
  • Sala

    I have been testing a couple of themes and for sure i love the current one that is installed, its called iwata. The problem i am having is the theme has a space on the left side. It’s like a sort of menu that displays date’s e.t.c

    This space has been bagging my head since there are some areas where the page do not have the details like for dates and so the page is still squeezed and the left side is empty.

    This appears to only be happening when using the site on desktop. I appreciate a better a way if you can figure out the better way we can handle the post page, pages of all site, maybe a css? https://sopriza.com/


    @phenomlab yes it’s a different theme. The other one was not offering much on editable sidebar. It was like flarum hahah
  • cagatay

    Hi Mark
    As you know i m using your proxy and all your js/css.

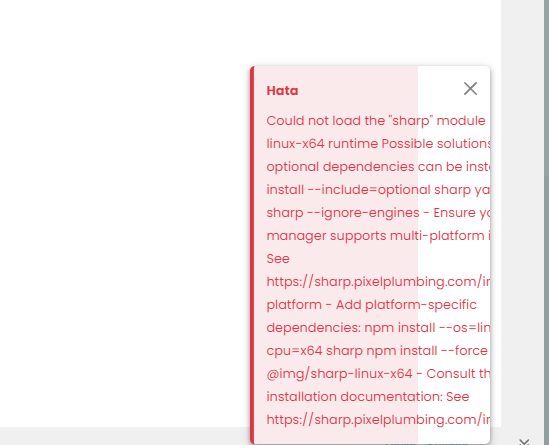
    I updated to 3.6.0 but when i want to copy/paste photo i faced the problem which shown below;

    a7035282-9513-4adb-b03c-2bc3df9b44f9-image.png

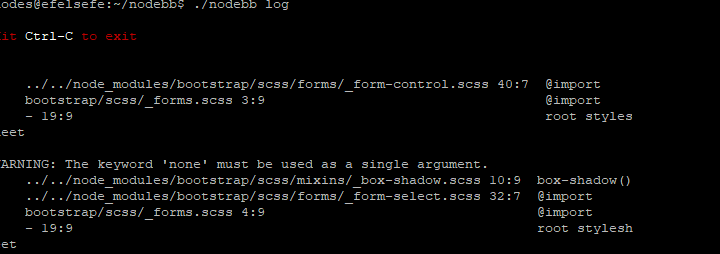
    this is my nodebblog;

    f1173ded-f11e-4ce0-9e2b-d000989ad28c-image.png

    8bade6d2-dd25-4266-bef9-c272fee4a412-image.png


    Thank you Mark.
  • DownPW

    Hello @phenomlab

    I search a javascript code for nodebb to block and replace with a specific/customize message domain an URL Wirth a blacklist on topic, quick reply and composer like plugin-beep do it.

    I’m working on it but I don’t have anything that works, hence the request for help from your expertise.

    here an exemple who doesn’t work

    // Add this script in a custom JavaScript file or inline in your HTML
    
    document.addEventListener('DOMContentLoaded', function () {
      // List of blocked domains or URLs
      var blockedDomains = [
        'example.com',
        'blockeddomain.com',
        // Add more domains as needed
      ];
    
      // Custom message to be displayed for blocked content
      var blockedMessage = 'This content is blocked.';
    
      // Function to check if a URL contains a blocked domain
      function isBlocked(url) {
        for (var i = 0; i < blockedDomains.length; i++) {
          if (url.includes(blockedDomains[i])) {
            return true;
          }
        }
        return false;
      }
    
      // Function to replace blocked content
      function replaceBlockedContent(content) {
        // Check if the content contains a blocked domain
        if (isBlocked(content)) {
          // Replace the content with the blocked message
          return blockedMessage;
        }
        return content;
      }
    
      // Get all the elements containing topic content (adjust the selector as needed)
      var topicContentElements = document.querySelectorAll('.topic-content');
    
      // Iterate through each element and replace blocked content
      topicContentElements.forEach(function (element) {
        element.innerHTML = replaceBlockedContent(element.innerHTML);
      });
    });
    

    Thanks


    Yes ogproxy too is functionnal on dev
  • cagatay

    Hi Mark
    I have a problem as below photo.
    I updated Mongodb after faced.

    65f231eb-204b-437e-8675-29f889e5cf57-image.png


    @phenomlab yes i did. i deleted one of plugin then it started to work normally.
  • Hari

    Managing videos is a big hassle. To follow the 3-2-1 backup strategy, I want to keep a copy of my videos online. After some research, I found that GoPro is the easiest and cheapest option, costing around $25 or $50 per year for unlimited footage. (i have 20TB videos)Now, the goal is to upload all my files to GoPro.

    GoPro doesn’t provide a drive-like system, so I need to upload files directly to the GoPro website. Before doing that, I want to add folder names to the file names using a Linux command to rename them. so i can use their search to find files later.

    All my videos are stored in Synology Drive in the following format:

    Videos/date/filename1.mp4
    

    I only want to rename the MP4 files to have the format date-filename1.mp4. How can I do this using a command targeting all directory and subdirectories?


    @Hari Yes, that’s one (of many) I would recommend. It’s going to be easier to do this under Windows and the fact that you are already connected using SMB is a huge plus.
  • phenomlab

    I came across this news article this morning

    https://news.sky.com/story/e3-cancelled-gamings-most-famous-event-killed-off-for-good-13028802

    This really is the end of an era, and it’s abundantly clear that the pandemic had a large part to play in its demise. From the article:

    It comes after plans for its return earlier this year were scrapped, with the likes of PlayStation maker Sony and Assassin’s Creed developer Ubisoft among the companies that planned to skip it.

    When big players such as Sony and Ubisoft do not plan on attending, the writing is on the wall. During the pandemic, various organisations were forced to adopt new ways of promoting their products, with live streams becoming the new normal - and by order of magnitude, a much cheaper alternative that has the same impact.

    This clearly demonstrates that technology is continually evolving, and there doesn’t seem to be any signs of a return to previous pre-pandemic forms on multiple fronts. Just look at how the work from home model has dramatically changed, with virtually every organisation having some form or remote working program they never considered before.

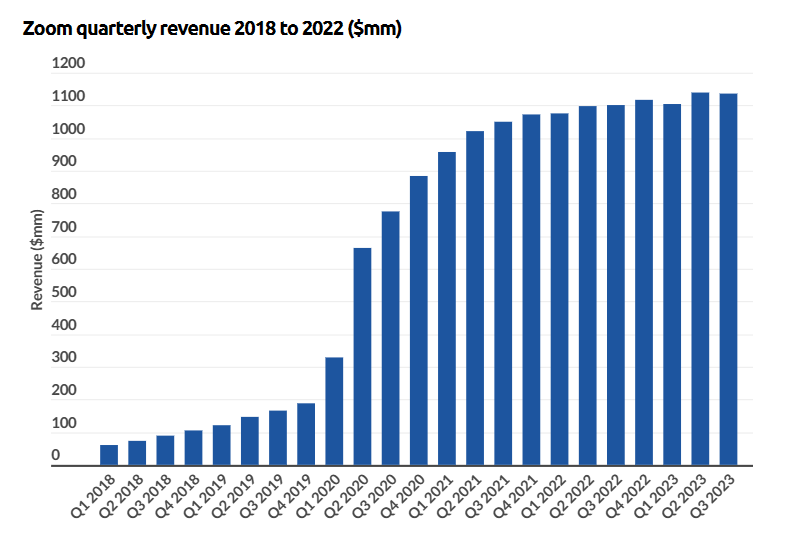
    Along the same lines, companies that were relatively minor before the pandemic have enjoyed a meteoric rise since being in a unique position to fill the void created by the pandemic. Out of the many is Zoom - take a look at the revenue graph below for an example

    b486247b-8af4-4b6a-b180-c27838d2c59f-image.png

    Source - https://www.businessofapps.com/data/zoom-statistics/

    At the peak of pandemic. Zoom reported 200m connections per day, and whilst that figure may have dropped of late, Zoom is still considered the #1 video conferencing tool and used in day-to-day life to facilitate meetings across the globe - even for people sitting in the same office space.

    However you look at it, most of these pandemic “rising stars” are now here to stay and considered part of everyday life.


  • Hari

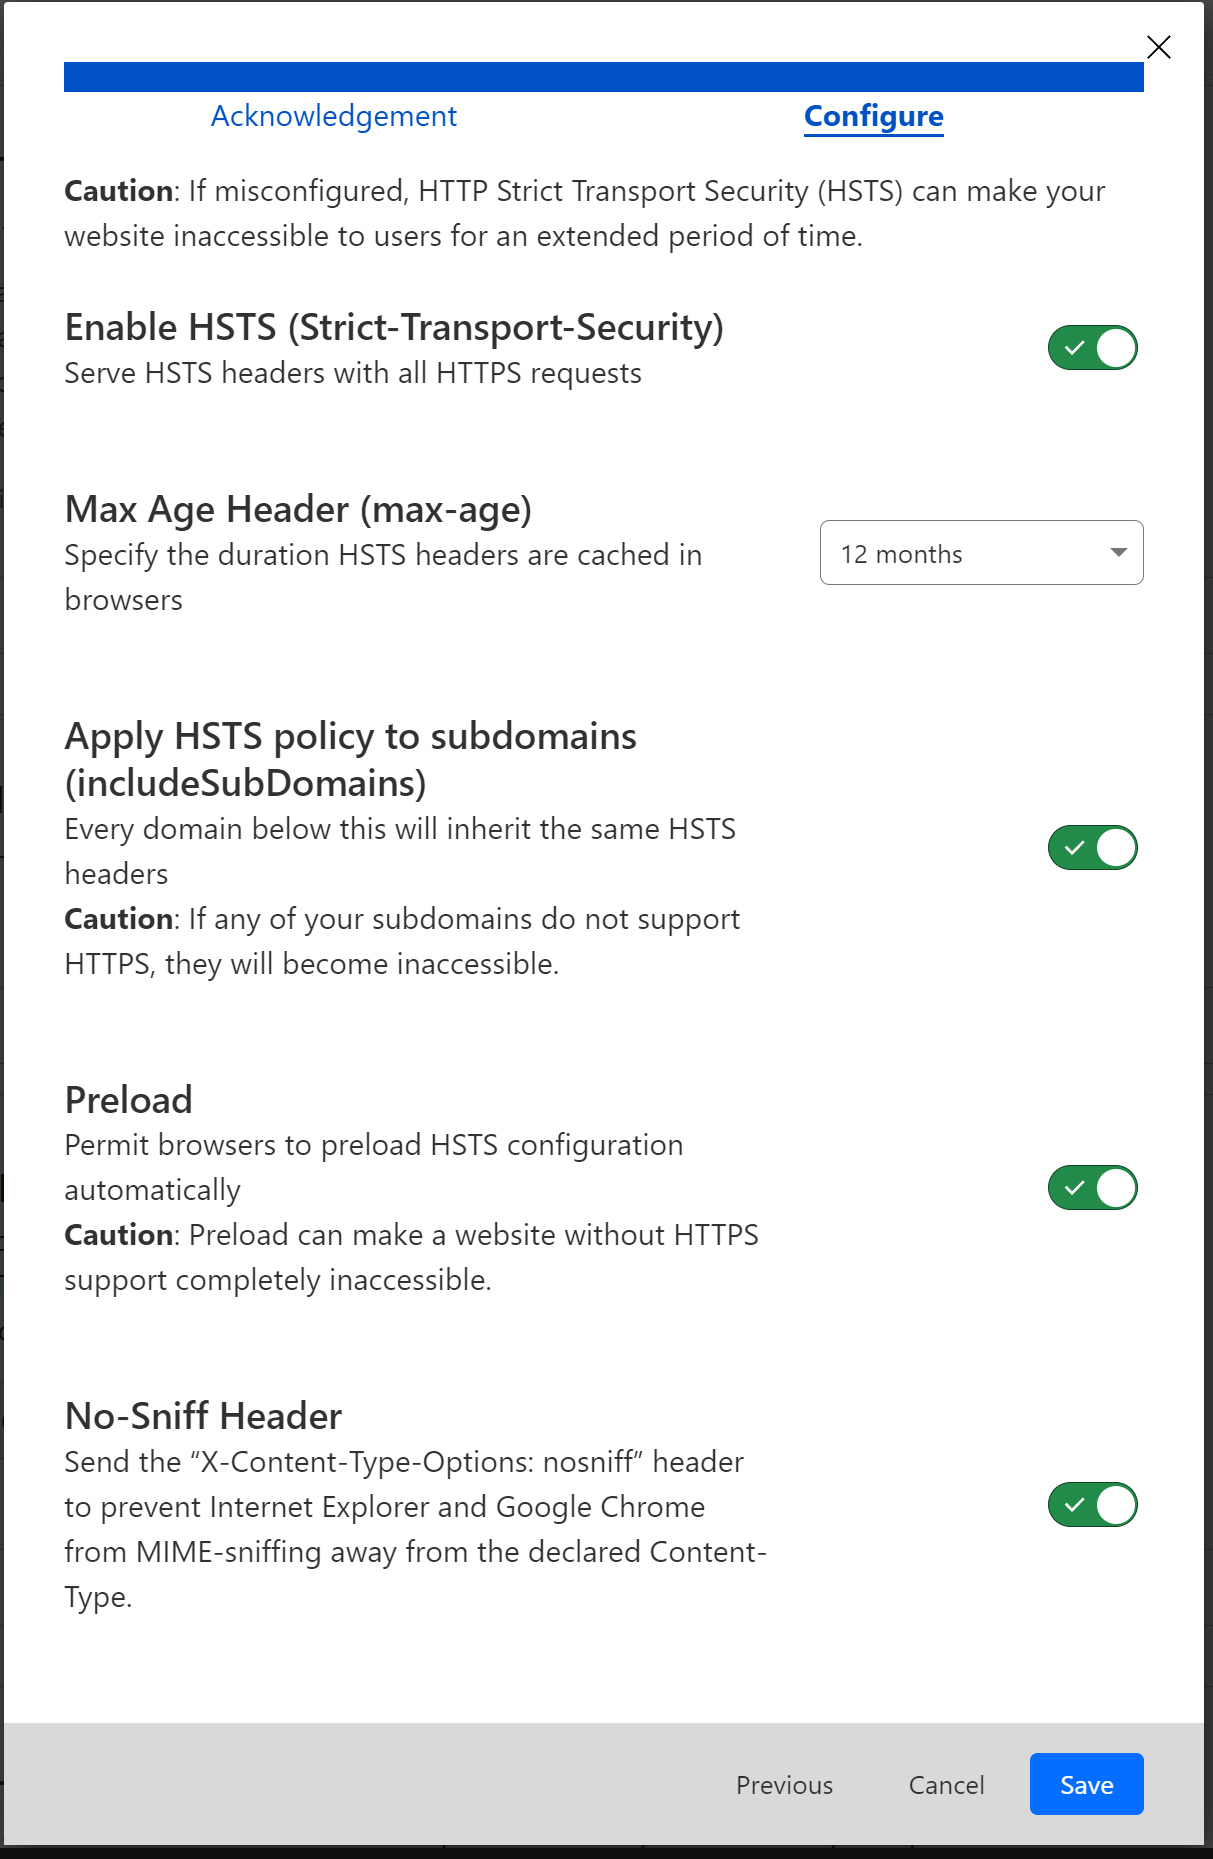
    Hello there! Yesterday, I visited IKEA and connected to public Wi-Fi. Google and other websites worked as expected, but when I tried to access my own website, it didn’t load for some reason. I received an HSTS error and had to switch to mobile data to access my site.

    I understand we can’t just turn off HSTS since we already said browsers that we will use HSTS for next 12 months

    I’ve been using these cloudflare settings for the past two years. If there are any adjustments that need to be made to ensure my site functions in public Wi-Fi areas, please let me know.

    3b60d995-88a1-4d76-9755-a82464675f32-image.png


    @Hari Ok, no issues. Keep me posted…
  • Hari

    Hi, hope you are doing great. 🙂

    I’m trying to configure Ghost, and after the installation, Ghost is functional. However, after 10min, it enters a redirection loop. I’m unsure whether the issue lies with Cloudflare, Ghost, or Ghost’s private mode. I would appreciate any insights you can provide on this matter.


    @Hari Really? Can you elaborate a bit more here?
  • veronikya

    Recently, ansible was used to automatically deploy the mongodb docker service, including replica sets. In version 7.0, TLS support is required to support replica sets. TLS signing is a problem for me.


    @veronikya said in mongodb replica set: The host’s local dns resolution is not configured. The problem of the host’s hosts being unable to be resolved in docker has been solved. Surprisingly Solution: Edit the /etc/resovel.conf file Add 127.0.0.53 One immediate issue I can think of here is that editing resolv.conf directly is no longer supported and not recommended (because the changes do not survive a reboot) - unless you install the resolvconf package?