NodeBB v3 Chat Very Slow
-
@DownPW None of those will impact the box size. Let me have a look.
-
yep not box size but we don’t see the bug
PW and WS Spirit alive
-
@DownPW what exactly is the bug? I’ve tested it, and it behaves normally from what I see (unless I completely missed something)?
-
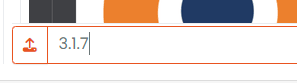
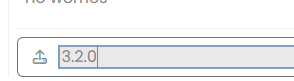
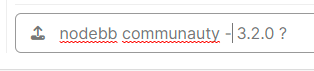
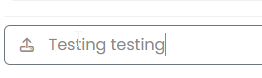
Size is good, is just the focus when we type text it has changed
on 3.1.7 :
On 3.2.0 here :
PW and WS Spirit alive
-
Size is good, is just the focus when we type text it has changed
on 3.1.7 :
On 3.2.0 here :
@DownPW Yes, that’s
input:focus- it’s used to style much larger boxes on focus, but I’ll need to create an exemption here. -
-
-
-
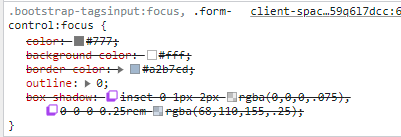
@DownPW As you indicated, but I need to make this more specific because it disables a wanted UI experience elsewhere
.form-control:focus {
    background: var(--bs-body-bg) !important;
    color: var(--bs-body-color) !important;
    /*box-shadow: 0 0 0 2px var(--bs-tag-bg) inset !important; */
    border-color: transparent !important;
}
Starting with this CSS
.form-control:focus { background: var(--bs-body-bg) !important; color: var(--bs-body-color) !important; border-color: transparent !important; } .write-container .form-control:focus { box-shadow: 0 0 0 2px var(--bs-tag-bg) inset !important; } -
-
Have you find better solution or this is the final @phenomlab ?
@DownPW this is the final solution from my perspective. The above code resolves the issue here.
-
Have you find better solution or this is the final @phenomlab ?
@DownPW i m also using last codes on my web site.
.form-control:focus { background: var(--bs-body-bg) !important; color: var(--bs-body-color) !important; border-color: transparent !important; } .write-container .form-control:focus { box-shadow: 0 0 0 2px var(--bs-tag-bg) inset !important; } -
I have search and I use this code. What do you think ?
textarea.bg-transparent.text-body.form-control.chat-input.mousetrap.rounded-0.border-0.shadow-none.ps-1.py-0 {
    box-shadow: 0 0 0 1px transparent inset !important;
}
PW and WS Spirit alive
-
I have search and I use this code. What do you think ?
textarea.bg-transparent.text-body.form-control.chat-input.mousetrap.rounded-0.border-0.shadow-none.ps-1.py-0 { box-shadow: 0 0 0 1px transparent inset !important; }@DownPW Seems fine.




Hello! It looks like you're interested in this conversation, but you don't have an account yet.
Getting fed up of having to scroll through the same posts each visit? When you register for an account, you'll always come back to exactly where you were before, and choose to be notified of new replies (either via email, or push notification). You'll also be able to save bookmarks and upvote posts to show your appreciation to other community members.
With your input, this post could be even better 💗
Register LoginRelated Topics
-
-
-
-
-
-
-
-
Nodebb Hashtag plugin
Solved General